Learn about how to use notifications to keep yourself and your agents on top of end user chatbot interactions!
Notifications
KLaunch offers several mechanisms for agents to receive notifications when users chat with chatbots. Next, we present the main types of notifications.
Notification on Chatbot start
The simplest way to setup notifications is to have a notification be triggered every time a user starts using a chatbot, that is, when the first user message is submitted.
To set such chatbot-start notifications, click your user icon in the upper-right, then Agent Profile, as shown below.

You can select how you want to receive notifications, for example by email in the below example.
Note: To enable SMS notifications, you must first go to Settings > Agents > Notifications tab > enter your Twilio credentials under “SMS Notification Settings”, so SMS notifications will be sent from your own Twilio phone number. Note that sometimes mobile carriers may block automated SMS notifications.

In above image, the agent has selected bot “SampleBotStudentFAQ”, which means that every time a user chats with this bot, an email will be automatically sent to the agent, which will contain a secure link to the user chat.

If your company has multiple agents, you may define notifications on the role level. For example, in the above image, we have set that every time a user chats with the DentistTemplate3 bot, all agents will receive a notifications through their preferred medium (email, SMS or Desktop).
Finally, note the toggle on the top of the page, where you can choose to receive a sound whenever a user sends a message, while you (the agent) are on the Chats page.
Note: Notifications are disabled during quiet hours and vacation times, which can be set in the Agents menu "Notifications" section:

Fine-grained Notification triggers
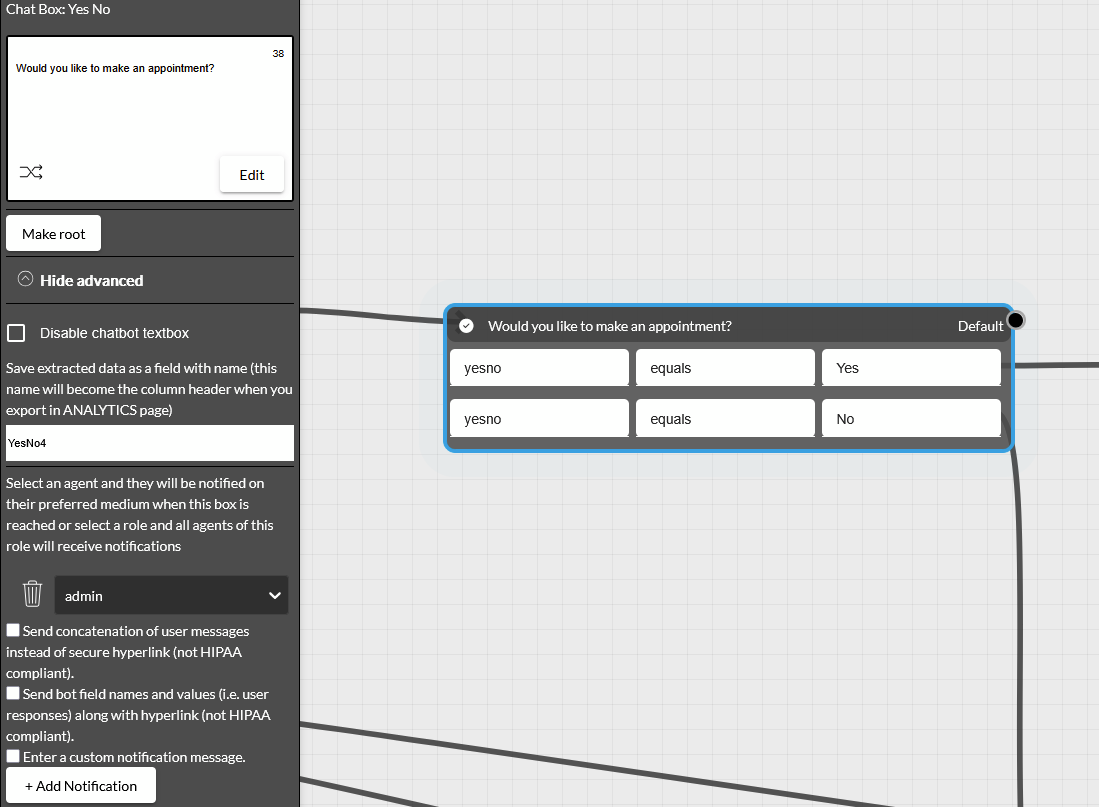
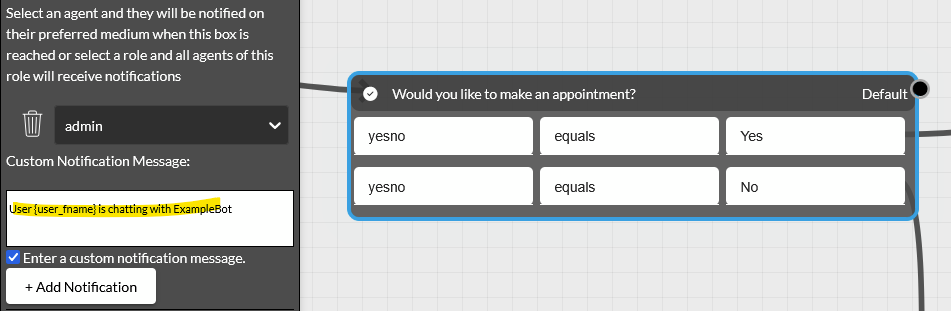
In some cases, agents may prefer to receive notifications only when the user reaches a particular stage during a chat. For example, suppose that you want to receive a notification (e.g., email) only when the user requests an appointment. For that, as shown in the image below, you can select the box right after the user indicates that they want an appointment, click “Show advanced”, then click on “+Add Notification”, and select who should receive a notification when the bot execution reaches that box.

In the drop down, you can select an individual agent or a role (e.g. “agent” or “admin”). In the below example, all agents will receive a notification when this box is reached. The notification for each agent will be delivered via their preferred media, as specified in the top of the Notifications page.
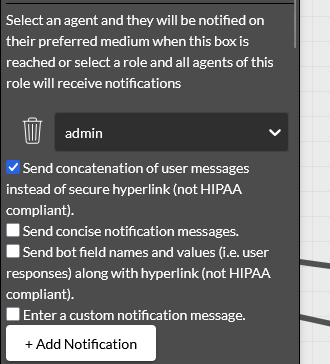
By default, notification messages contain a secure hyperlink, which the agent has to click to access the conversation. If there are no strict privacy consideration (e.g. HIPAA not required), you may instead set the messages to include all user messages, instead of a hyperlink. For that, check that option as shown below.
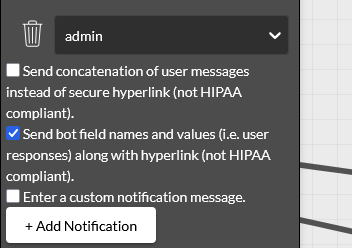
Another option is to include all fields collected by the bot into the message. For that, check that checkbox as shown below.
Custom Notifications: Another option is to specify a custom message that an agent will receive as a notification. To write a custom notification message, click the checkbox “Enter a custom notification message.” Then, you can write your message and include variables by enclosing them in curly braces, as shown below.
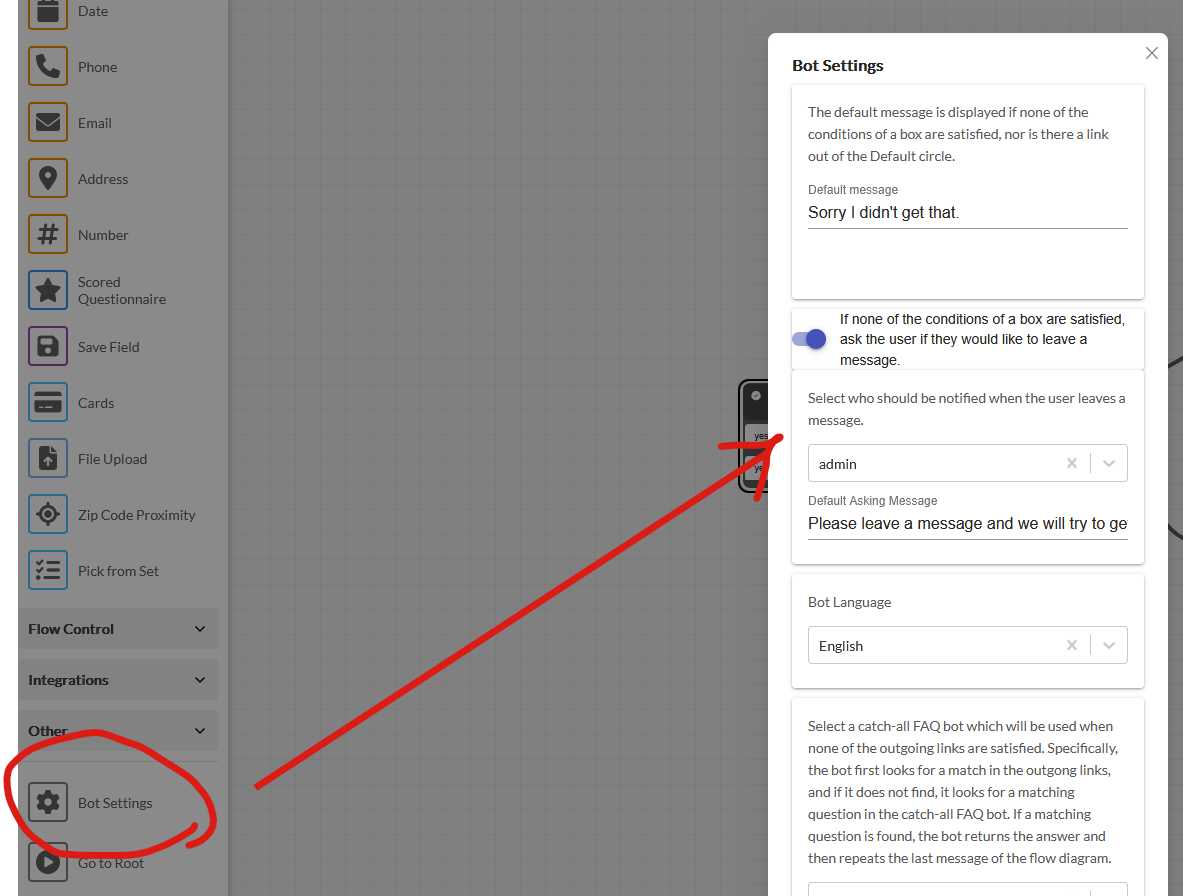
Notification when user leaves message after quitting a bot
Another scenario where you may want to receive a notification is when a bot is unable to address a user’s questions, and offers the user the option to leave a message. To do that, scroll to the bottom of the left pane, choose Bot Options, then select “If none of the conditions of a box are satisfied, ask the user if they would like to leave a message,” and then select who should receive a notifications, as below.